METOPE
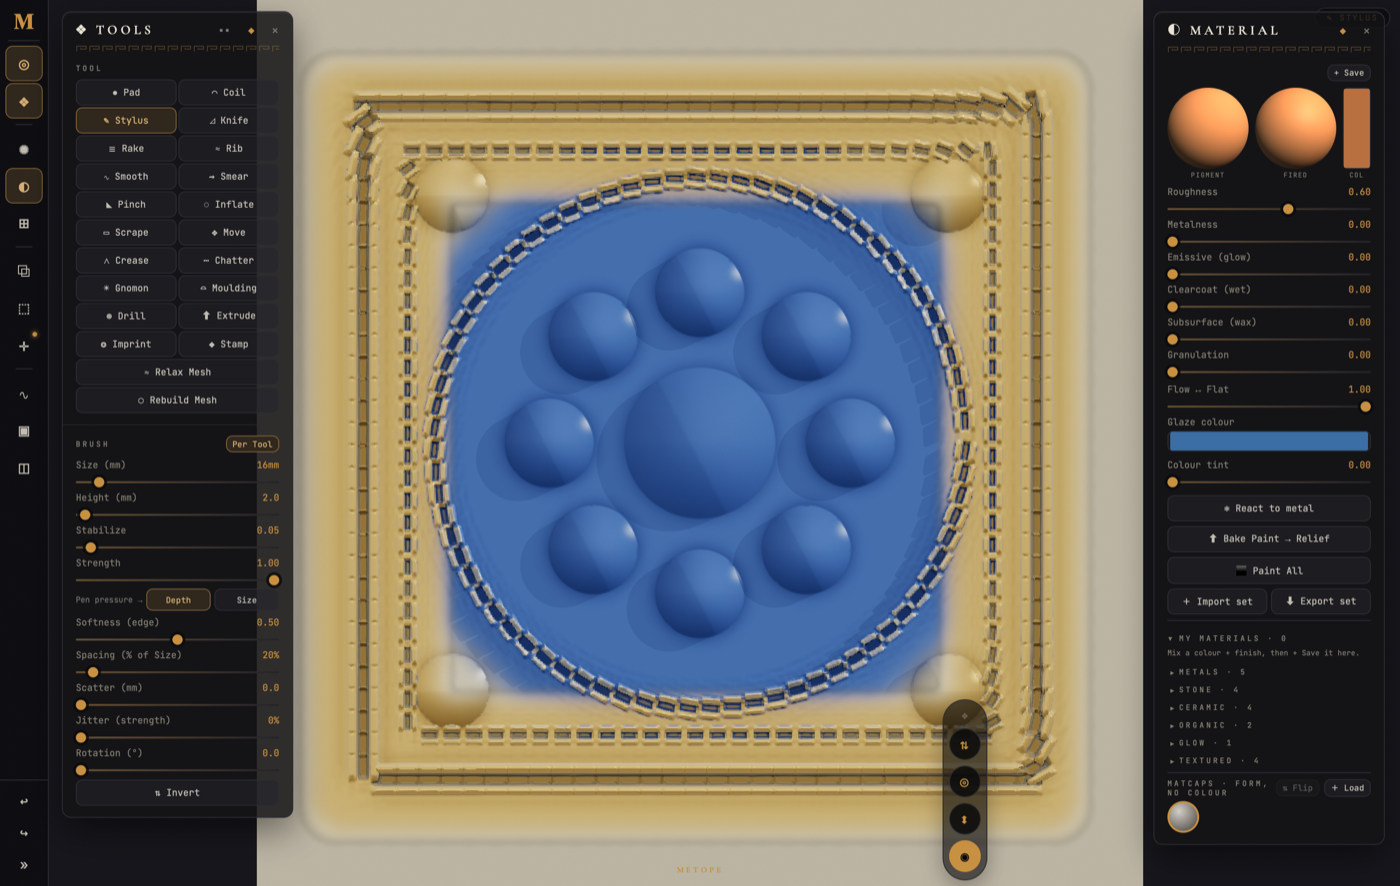
METOPE — a relief-carving studio that runs in a browser. Brushes displace a real height map instead of pushing pixels, so everything you make is honest depth: it can be lit from any angle, milled on a CNC, printed in five filaments, or exported as a digital sculpture. It is named for the carved panels between the triglyphs of a Doric frieze.
One file, metope.html. No install. It runs on the studio Mac and on the iPad with the Pencil, and your work lives in the browser until you export it.
This page is the whole manual. The same text as a single file: the full user guide — revised 2026-07-27 against the live app.
Contents
The big idea — registers
A piece is built from independent registers, each of which reads the relief and the light.
| register | what it is | where |
|---|---|---|
| form | the actual height (the clay) — the mill truth | a shape tool |
| pigment | flat colour | ◉ Paint |
| finish | roughness · metalness — pools with the relief | ◐ Glaze |
| glow | emissive, rides in the glaze register | Glaze + Emissive |
| texture | painted micro-surface | ⊞ Texture |
| region | which face set this belongs to | ▦ Set |
The shape tool is a single choice (tap the active one again to switch it off). Paint / Glaze / Texture / Set are independent toggles. So one stroke can be Pad + Paint (clay and colour at once), Pinch + Texture + Glaze, Stamp + Set (the motif marks its own region) — or, with the shape tool off, pure surface painting with no carving at all. If nothing is on, the brush does nothing.
The Atelier
The interface is a workbench you arrange yourself. The piece fills the window; the controls live in three places.
The spine down the left edge — every section, one glyph each, grouped by craft: look (◎ Navigator · ❖ Tools), surface (✺ Light · ◐ Material · ⊞ Texture), build up (⧉ Layers · ⬚ Face Sets · ✛ Scaffold), block (∿ Depth · ▣ Canvas · ◫ Project). A glowing dot on a glyph means that system is live. Undo and redo sit at its foot; » widens the spine so every glyph carries its name; the Μ monogram at the top opens the Interface tablet.
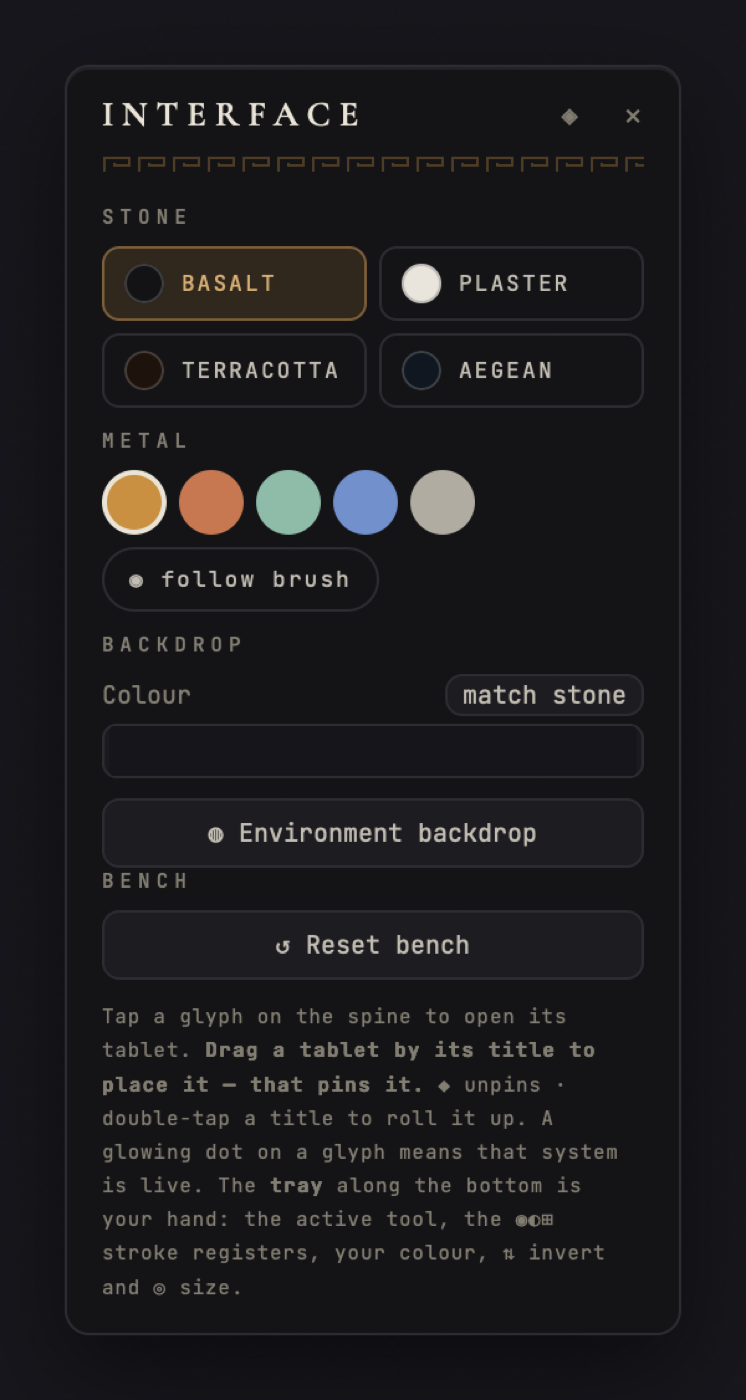
The tablets — tap a glyph and that section comes out as a floating drawer. Drag a tablet by its title to place it and that pins it (the ◈ turns gold). Pinned tablets stay where you put them across reloads; unpinned ones close by themselves when you open another. Double-tap a title to roll one up to just its header.
The dock and the radial palette — what your next stroke will do stays in your hand, not in a drawer.
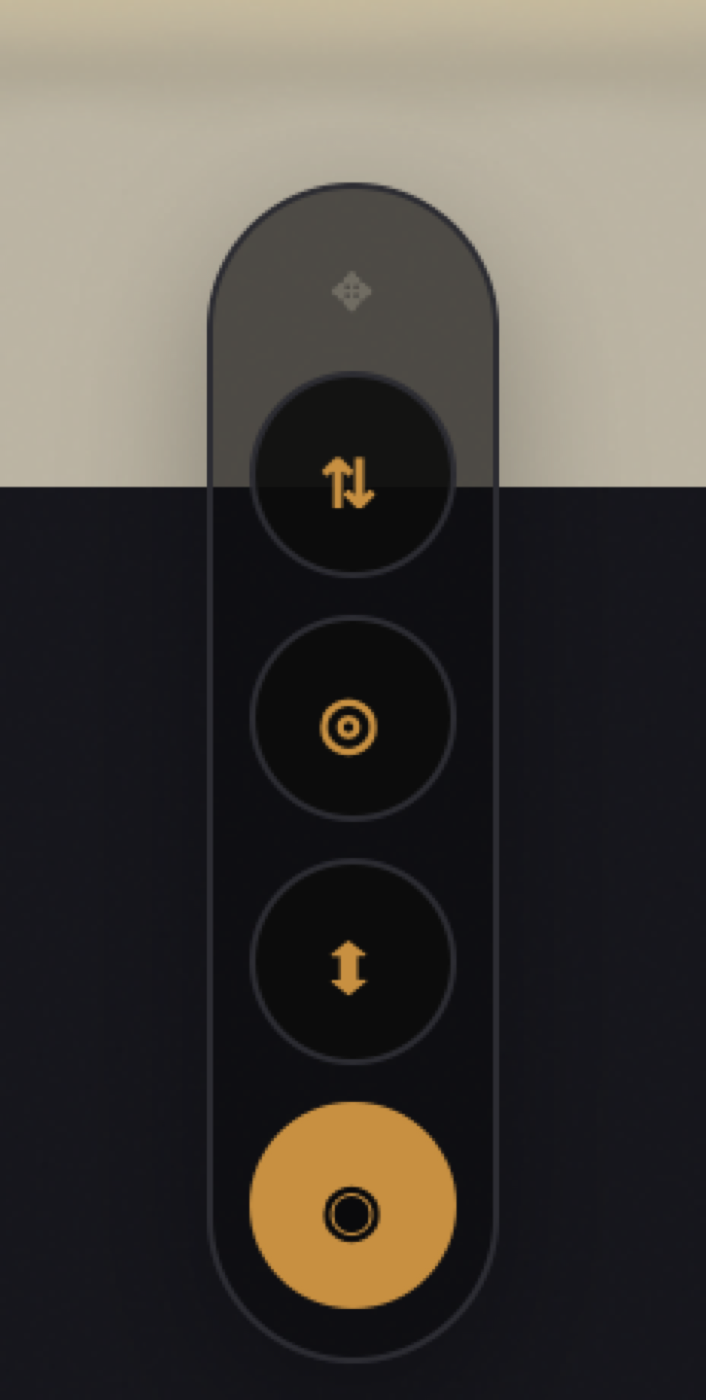
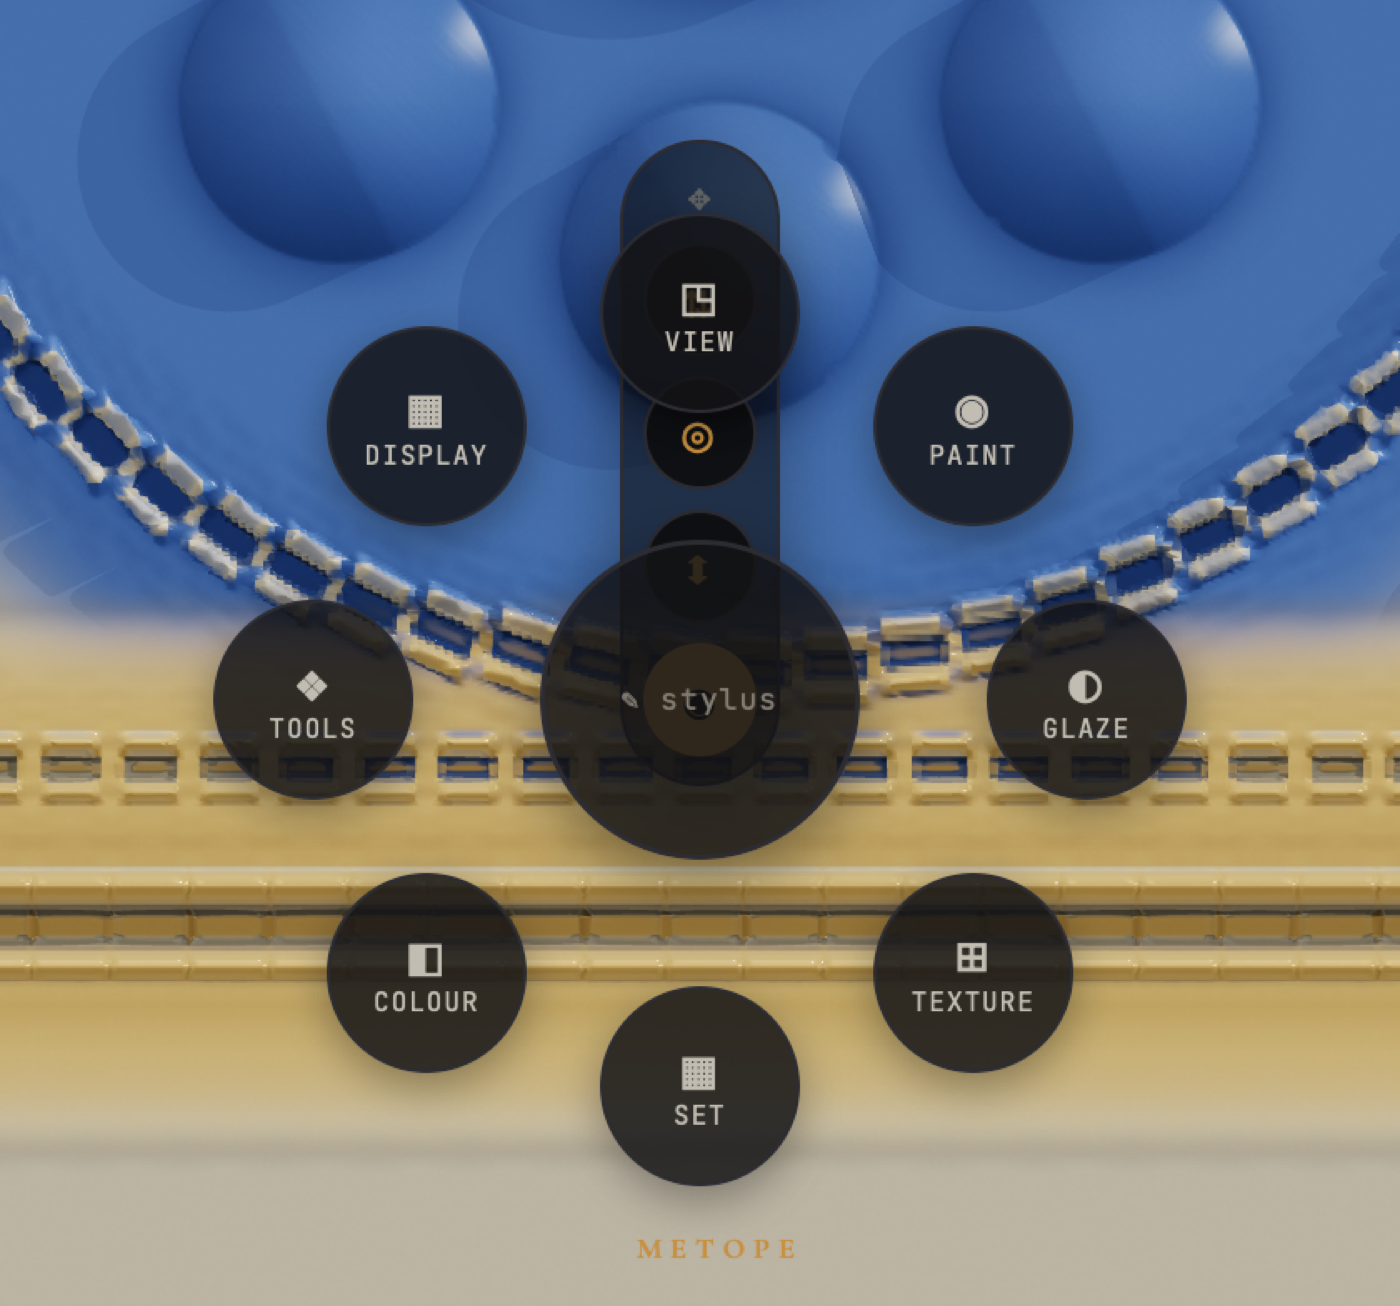
The dock is a small floating pill: ⇅ Invert (a touch-friendly ALT), ◎ Size and ↕ Height (press and drag to scrub the brush), and the gold palette disk. Drag the ✥ grip to put it anywhere; it remembers. Tap the disk — or tap the Spacebar, or press the disk and flick toward a wedge — and the radial palette opens where your hand already is: view modes, the four stroke registers, colour, every shape tool, and the display toggles. The centre names your current combination.
The Interface tablet (Μ) sets the room: four stones (basalt, plaster, terracotta, aegean), five metals — or follow brush, where the whole interface takes on your current paint colour — the viewport backdrop, and reset bench.
Navigating
On the iPad the Pencil draws and the finger navigates, never the reverse: one finger rotates (or pans in flat view), two fingers pan, pinch zooms, a two-finger tap undoes and a three-finger tap redoes.
On the desktop, left-drag draws; right-drag or Space-hold-drag pans or orbits; scroll zooms. A quick tap of Space summons the radial palette instead. 5 toggles flat orthographic (for precise painting) against perspective (to read the relief). Home fits the view.
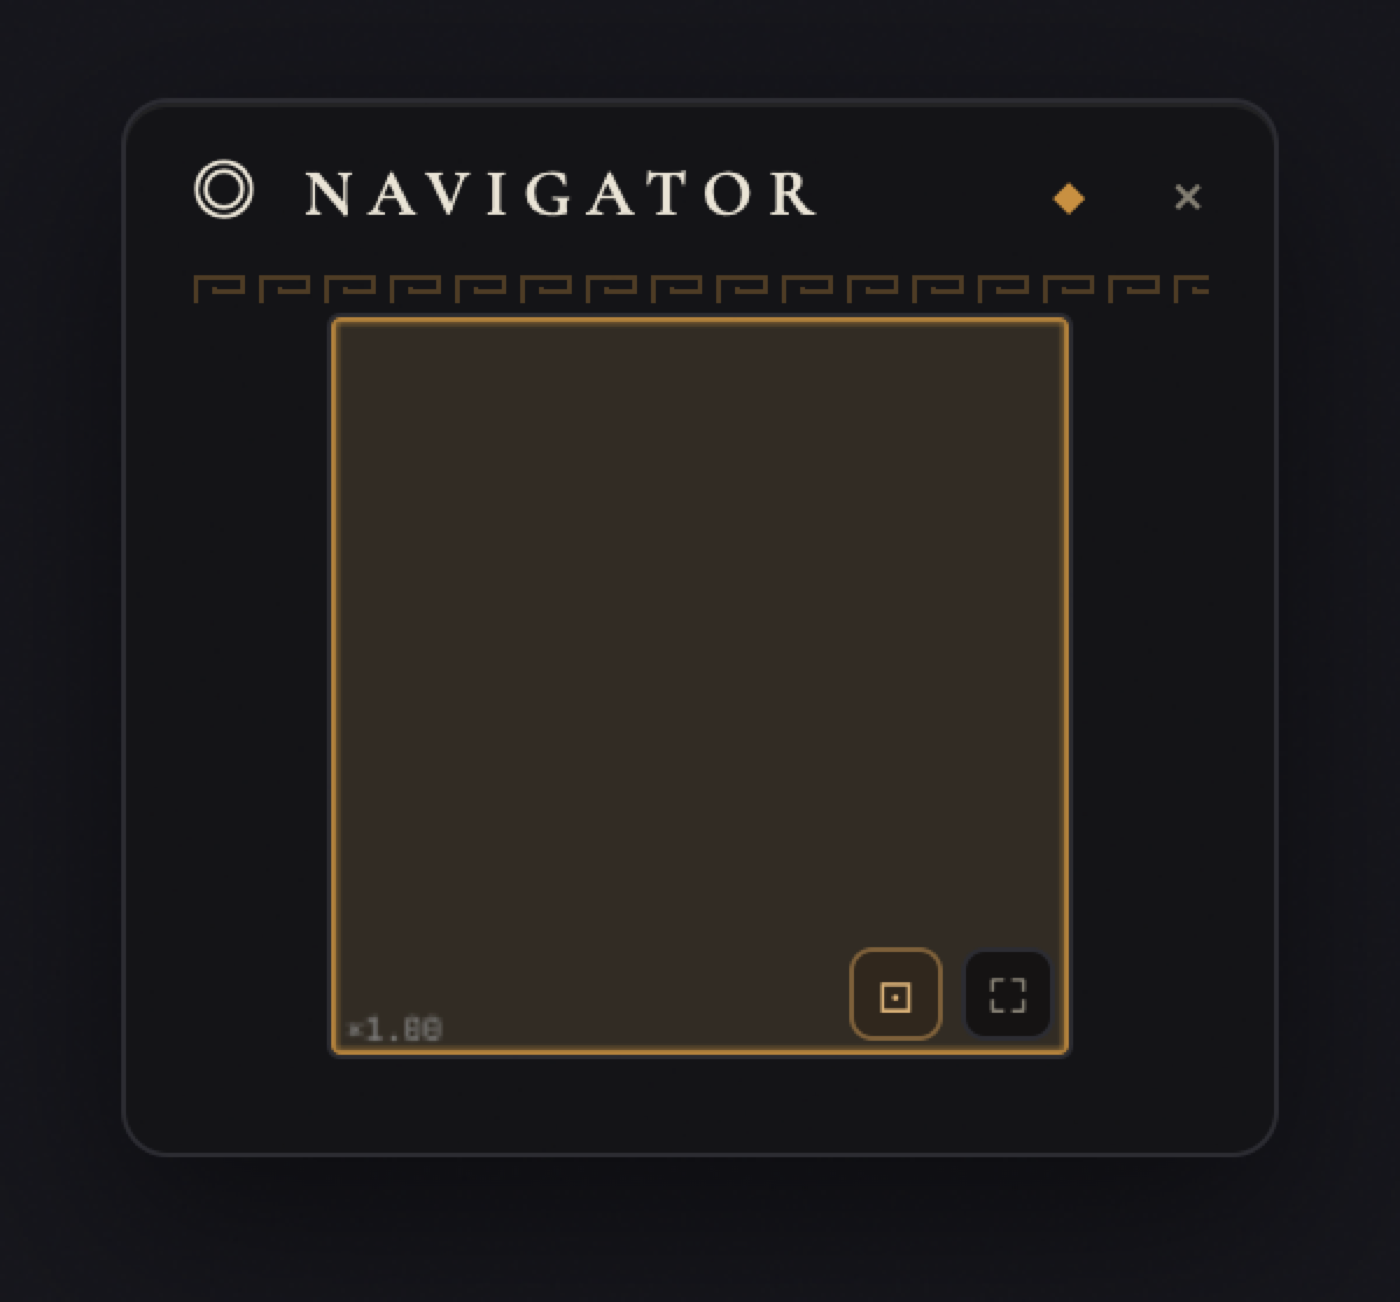
The Navigator tablet holds the corner mini-panel and the five ways of looking: shaded PBR (the real thing), height map, normals, heatmap, and matcap — form only, no colour or material, which is how you judge a relief honestly. In flat view the mini-panel is a navigator, with an orange rectangle marking your zoomed region; in 3D it becomes an orientation gizmo you can drag to orbit.
The tools
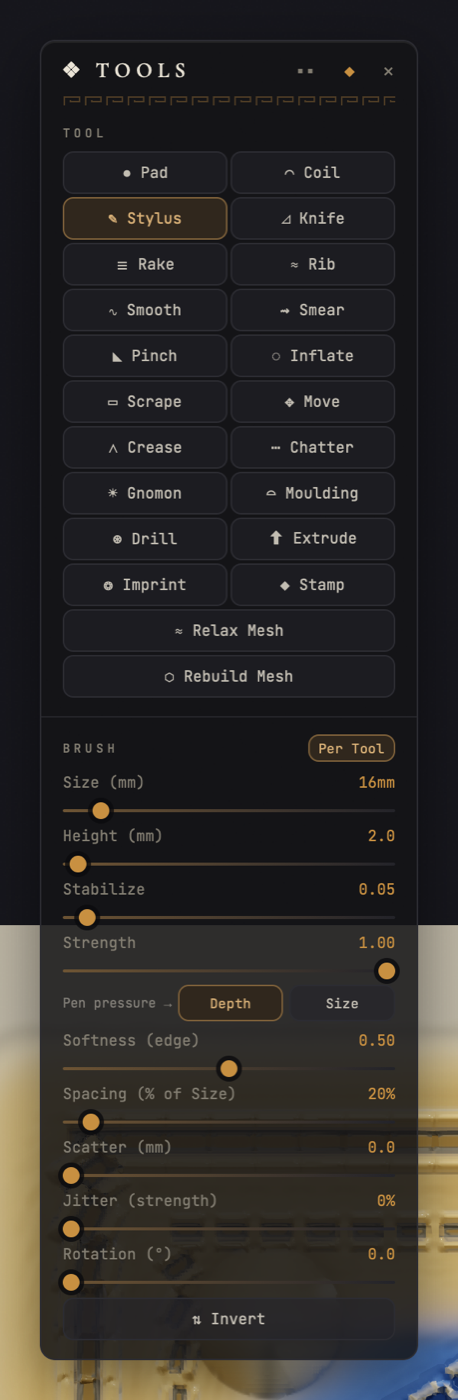
Twenty shape tools. Every one of them inverts with ALT (or the ⇅ button) into its opposite.
Deposit and incise — ● Pad lays a soft dome of clay; its cross-section is a profile you pick (round, U, V, square, or a PNG whose brightness is the tip), and Nib width squashes it into a chisel-edge ellipse held at a fixed angle: broad-pen calligraphy in relief. ⌒ Coil lays a rope that actually coils, with twisted plies winding along it — twist, strands, stretch, hand-rolled wobble, S or Z direction like real cordage, and a braid mode where both ply systems cross into a plait. Inverted, with twist on, that is cord-marking — Jōmon. ✎ Stylus incises a soft-shouldered channel with piled side-ridges (sgraffito). ⊿ Knife cuts a thin sharp crease with crisp walls and no ridges; its blade length is decoupled from size, so a short nib traces any curve cleanly while a long blade cuts straight and fans on tight turns. ☰ Rake is a clay comb of 2–20 tines. ⋀ Crease pinches a V-groove along the stroke.
Push the clay about — ≈ Rib, the kidney scraper, blurs hard toward the local mean and removes detail. ∿ Smooth rounds sharp edges and softens bumps while keeping the forms. ⇝ Smear drags the surface sideways like wet clay; ✥ Move takes a whole neighbourhood along as one blob. ◣ Pinch draws the surrounding relief inward to sharpen a ridge; ◌ Inflate swells existing forms outward, with a roundness control that runs from balloon-like to crest-sharpening.
Cut architecture — ▭ Scrape is an oriented flat cut that levels a rectangular facet, optionally with rasp teeth tearing its long edges. ⌓ Moulding extrudes a classical cross-section along the stroke — fillet, splay, cavetto, ovolo, torus. ⋯ Chatter makes the tool rhythmically skip, a run of pearl beads every so many millimetres, with a choice of bite shape; run it around a circle and you have bead-and-reel, run Moulding along the same path and you have the whole frame.
☀ Gnomon is the strange one: you draw with shadow. Your stroke marks where shadow should fall, and the brush raises a lit wall on the sun side of the line, its height calibrated to the key light's elevation so the cast shadow covers exactly what you drew. It wants low raking light — at noon no wall is tall enough, which is physics, not a bug. Move the light and the drawing dissolves: a mark that only exists in the light.
⊛ Drill punches a hole to an exact depth, however long you dwell; softness turns the bore into a countersink and tilt rakes it into the classical trapano scoop. Set the depth past the material thickness and it pierces clean through — a real hole opens in the block, you see straight to the backdrop, and every export carries the opening as true watertight geometry. Inverted it raises the matching peg, so holes and pegs pair like mortise and tenon. ⬆ Extrude is its opposite: everything under the stroke rises by exactly the set height, existing modelling intact, with a die-straight wall at the edge. One stroke is one layer; stroke again to stack another.
❂ Imprint and ◆ Stamp press a shape into the clay — dragged along a stroke, or once.
Two whole-surface buttons sit under the grid: ≈ Relax Mesh smooths ragged walls everywhere while keeping the big forms, and ⬡ Rebuild Mesh re-tessellates the preview so near-vertical steps become real walls with smoothed rims instead of a pixel staircase. That rebuild runs by itself a moment after every carving stroke, so the button is only for the extra-dense version before showing work.
The Model Stamp
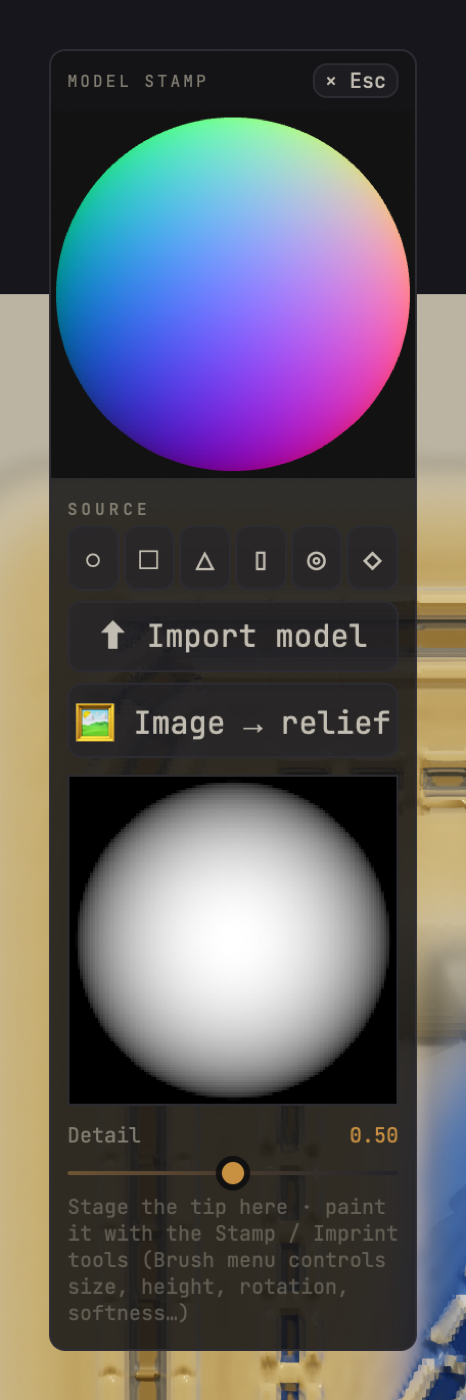
Choosing Imprint or Stamp opens the press-plate window. Three kinds of source: primitives (sphere, box, cone, cylinder, torus, icosahedron — orbit the preview and the depth seen from that angle is what presses), a 3D model of your own (.glb, .gltf, .obj, .stl — auto-levelled so the silhouette presses flush and the nearest point uses your full height), or an image turned into relief.
The image path has grown teeth: brightness-as-height is the default, but 🧠 AI Depth estimates true depth from a photograph instead, which is what you want for faces and lit objects; ▁ Level background flush stops a photo pressing its whole rectangle up as a slab; ✂ Remove Background cuts the subject out entirely. The Detail slider decides how much of the height budget goes to fine surface modelling rather than the gross front-to-back form — on an in-the-round sculpture the nose-to-ear depth otherwise eats everything and the carving presses invisibly shallow.
The press takes the shape of whatever you bring in. There is no circular bound: a transparent PNG presses its cut-out, a model presses its silhouette, and the cursor mirrors it so you see exactly what will land.
Material
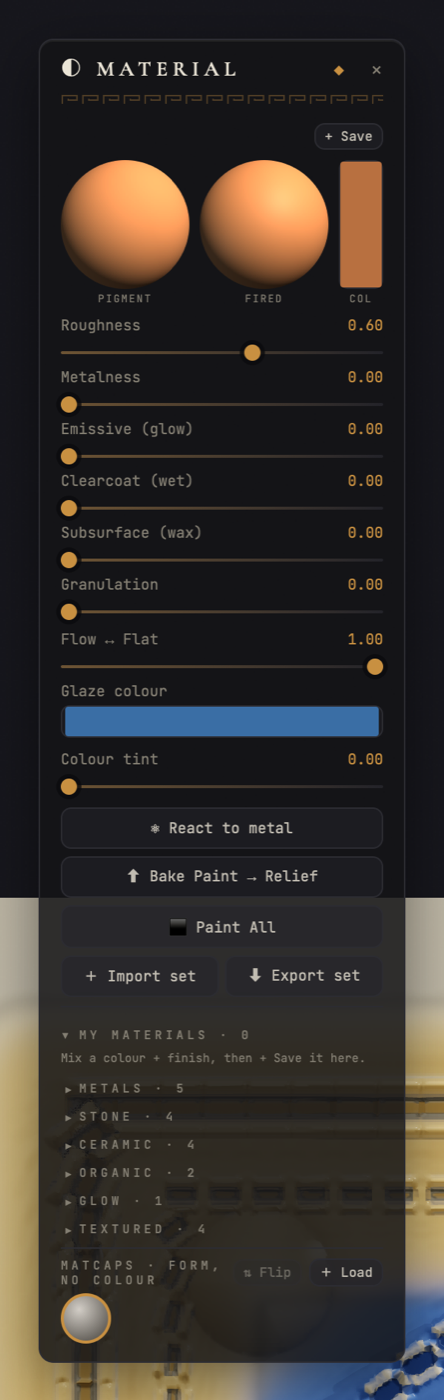
Two preview balls sit at the top: pigment (your colour, matte) and fired (the same colour with the real roughness, metalness and glow). Below them, the finish that Glaze lays down, and three whole-piece finish characters — clearcoat for a wet glazed sheen, subsurface for the way wax and jade and thin marble let light wrap round a form, and granulation, which settles pigment darker in the micro-recesses like a dirty wash.
The glaze has its own colour, independent of the paint colour, so a piece can be terracotta pigment with celadon pooled into the hollows. Flow ↔ Flat decides whether the finish pools in the relief or lies evenly. ⚛ React to metal makes a reactive glaze that only adheres where the surface is already metallic — size it first, then glaze freely, and it self-masks like gold leaf. ⬆ Bake Paint → Relief does the opposite trick: it raises real relief wherever you have painted, which is slip-trailing, raised enamel.
The library holds metals, stones, ceramics, organics and a glow, plus textured sets — Carrara marble, travertine, oak grain, hammered bronze — which are real image materials that lay veining, pores and micro-relief together, tiled at true millimetre size. You can import your own PBR set (albedo plus optional roughness and height), or a zip straight out of the marble and wood studios in LAPIDEO-Research, and export any set to share.
Texture — the pattern studio
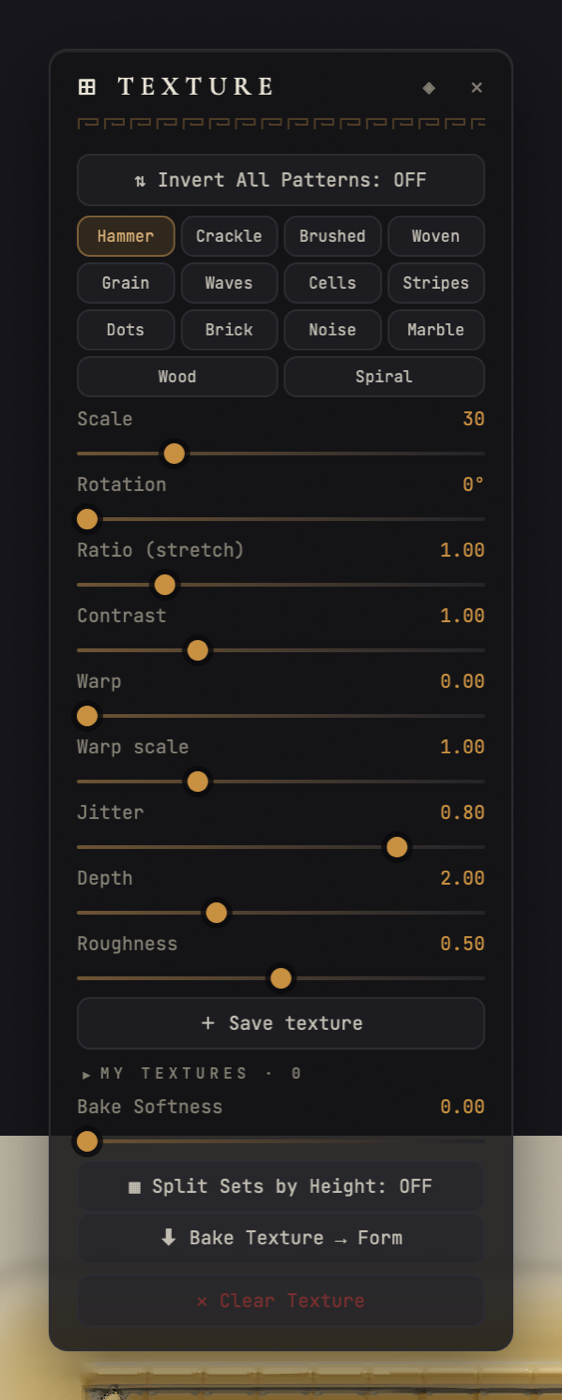
Fourteen pattern primitives — hammer, crackle, brushed, woven, grain, waves, cells, stripes, dots, brick, noise, marble, wood, spiral — shaped by scale, rotation, ratio, contrast, warp, jitter, depth and roughness. Cells can become cracks along the cell boundaries instead of filled cells; the spiral can become concentric circles. Marble, wood and spiral each get two extra controls of their own (vein angle and complexity, cathedral-versus-straight and ring sharpness, epicentres and centre spread).
The sliders edit the pattern in place — strokes you already painted with it restyle live. Save a recipe to My Textures and it gets its own slot, so a variant can live beside the original.
⬇ Bake Texture → Form carves the painted pattern into the real millable height at its own depth. With the ▦ Set register on, the baked pattern also becomes a region — and with split sets by height, one bake yields two regions: the raised areas and the recesses, brick faces and grout, whose borders align exactly with the carved relief.
Layers and smart materials
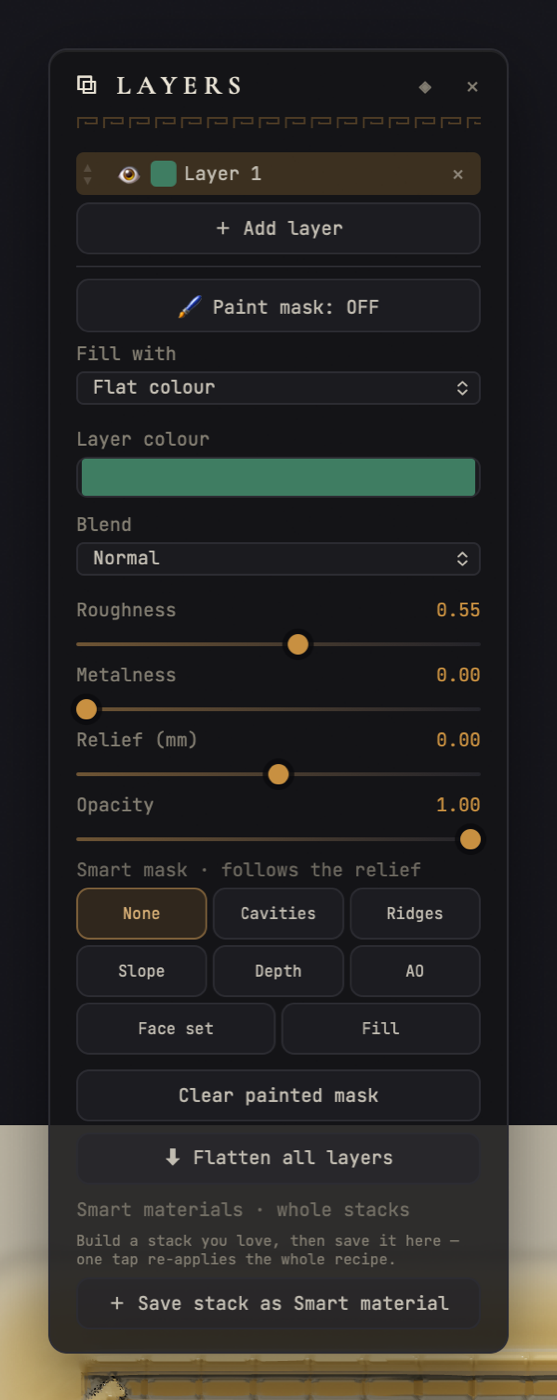
Up to twelve non-destructive layers, each a material revealed by a mask, the way you would build a piece in Substance Painter. A layer can be a flat colour or a whole material set, blended normal, multiply, add, screen or overlay, and it can carry relief of its own — where its mask shows, the displayed surface rises or sinks, shaped by the set's height map. The real millable height stays untouched while layers are live; flattening presses the relief in for good.
Masks can be hand-painted, or found by the relief itself: cavities pool verdigris into the carving, ridges catch worn highlights on edges, slope picks steep faces, depth a height band, AO settles broad grime into wide hollows, face set masks a region, fill covers everything as a base to paint into. Smart masks re-flow as you carve — change the relief and the dirt follows it, including relief that a layer above just made.
A whole stack can be saved as a smart material and re-applied in one tap on a different piece; the smart masks re-derive on whatever relief they land on, which is what makes it portable.
Light and environment
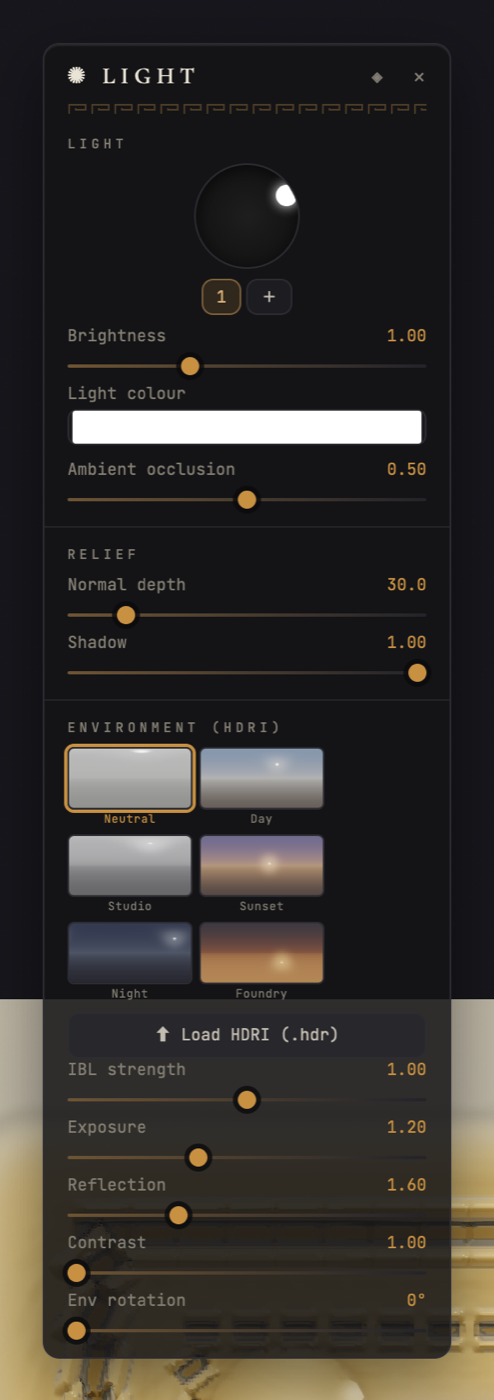
Up to three raking lights, each casting its own shadow, aimed by dragging their dots on an orb — the edge is grazing, the centre head-on. Each has its own brightness and colour. Ambient occlusion darkens crevices by how much the relief rises around each point, computed live from the height field.
Six skies come built in — neutral, day, studio, sunset, night, and foundry, an ember glow from below that is worth trying with bronze and emissive — and you can load your own .hdr files into the gallery. Reflection and punch control how much the metal pops and how filmic the contrast is.
Scaffold — symmetry, grids, guides
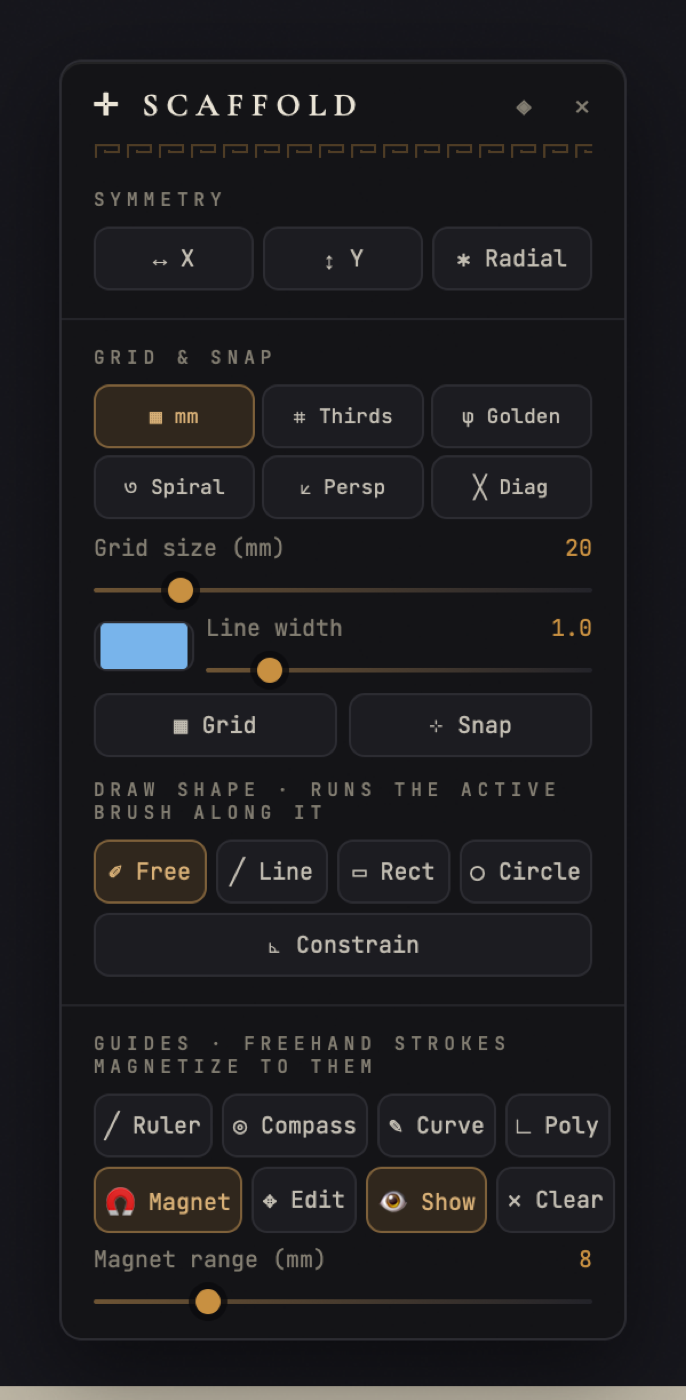
Symmetry mirrors every stroke live across X, Y, and N-fold radial (2 to 16) — with a circular canvas that is a rosette machine.
Six grids: millimetre (the one snap uses), thirds, golden sections, the golden spiral, one-point perspective with a vanishing point you can place off-canvas, and a diagonal armature.
Draw shapes — with line, rectangle or circle armed, one press-drag-release lays the active brush along that ideal path. Line plus Stylus is a perfectly straight carved groove; circle plus Pad is a ring of domes; circle plus Moulding is a turned frame.
Guides are the other half of that idea: a ruler, a compass circle, a freehand curve you sketch once, or a polyline you tap out corner by corner — made for the Greek-key meander, with a live millimetre readout and 0/45/90° constraint. A guide stays on the canvas, and with the 🧲 magnet on, any freehand stroke that starts near it locks onto it for the whole stroke: every dab lands on the line, rake tines align to it, and a ruler stroke stops dead at its ends like a real straightedge. Strokes that start further away stay completely free. Sketch a vine scroll once, then carve it deep, glaze it, and drybrush its ridges — every pass on the same line.
Regions — face sets
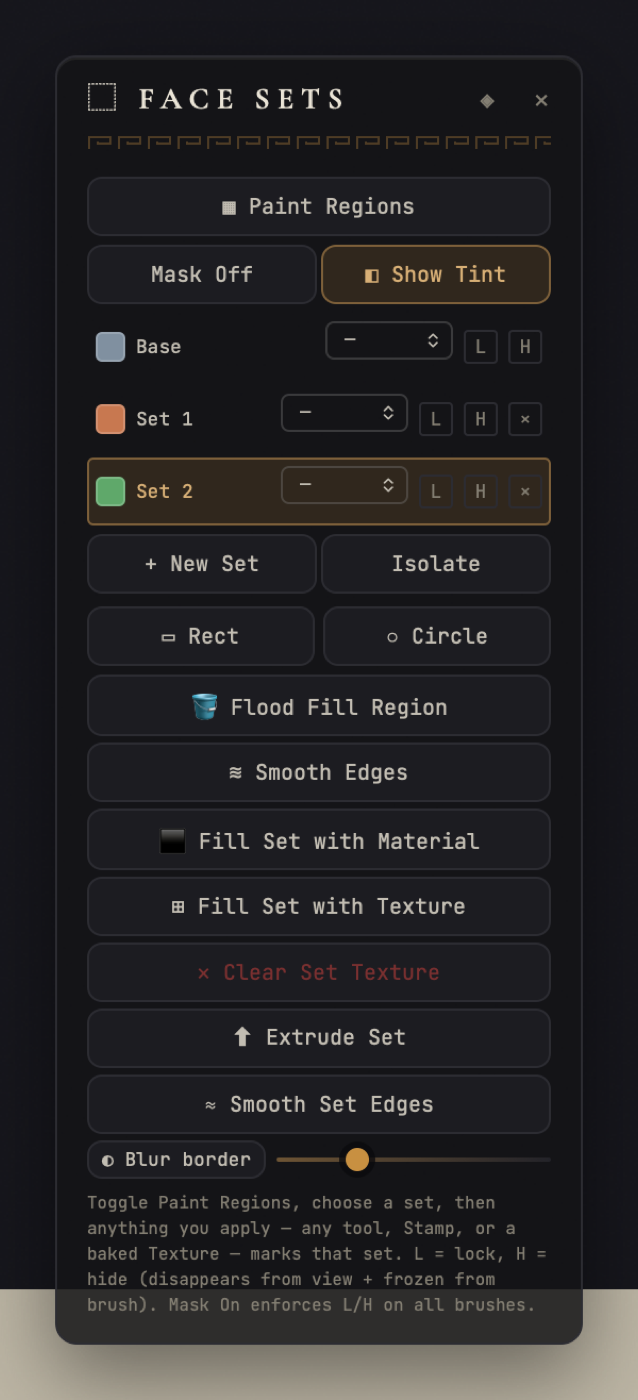
Face sets are hand-painted regions that act as a spatial mask for every brush. Switch on ▦ Paint Regions and anything you apply marks the active set: a stroke marks its footprint, a stamp marks the motif's exact silhouette, a texture bake marks the pattern. Lock a set, turn masking on, and you can paint the next one hard against it without clobbering it.
Regions can be drawn exactly (rectangle, circle), flood-filled into the contiguous blob under the cursor, smoothed at their edges by a brush or all at once, filled with a material or a texture, and — the useful one — extruded: the set's exact silhouette rises by the brush height as one clean layer with true walls at the border. Stamp a motif with the Set register on, tap Extrude Set, and the motif stands up as a solid step. The step's walls belong to the set too, so in five-colour printing an extruded region comes out one solid colour, sides included.
Each set can also carry its own stone — and that is opus sectile: a porphyry rota inlaid in a Carrara ground, or in plain clay. Two sets of the same stone are different slabs, not clones, and carving through an inlay reveals its figure just as it does the block's.
Depth, and the machine
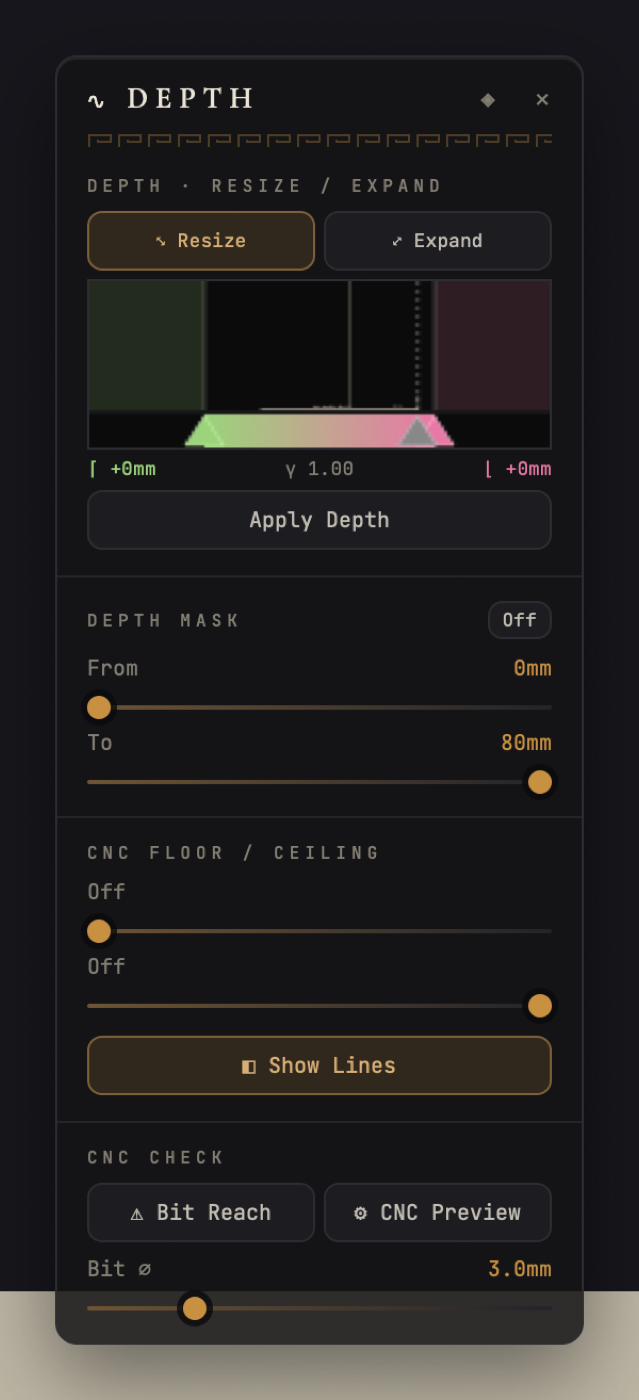
The block's total depth can be changed without deleting any carving; the relief's contrast can be stretched to fill it. A depth mask restricts brushing to a band of height.
A CNC floor stops carving below a set depth (mill-bed safety) and a CNC ceiling stops building above one, so you can dig away and rebuild without ever exceeding your board's real thickness. The brush's height slider tracks whichever limit governs the current tool and invert state, so its number stays honest.
CNC Check answers whether a router could actually cut this. ⚠ Bit Reach tints magenta every spot a flat-end bit of the chosen diameter cannot reach — slots, pockets and holes narrower than the bit — as a pure warning overlay. ⚙ CNC Preview shows what the machine would really produce, collapsing the unreachable zones to the machined surface in amber, with your sculpt untouched underneath. While that preview is on, every export is what you see: STL, GLB, print and ZIP all carry the machined surface. (Note that this is bit reachability, not a sculptural undercut — a heightfield cannot hold an overhang, so there is no undercut for Metope to have.)
The block
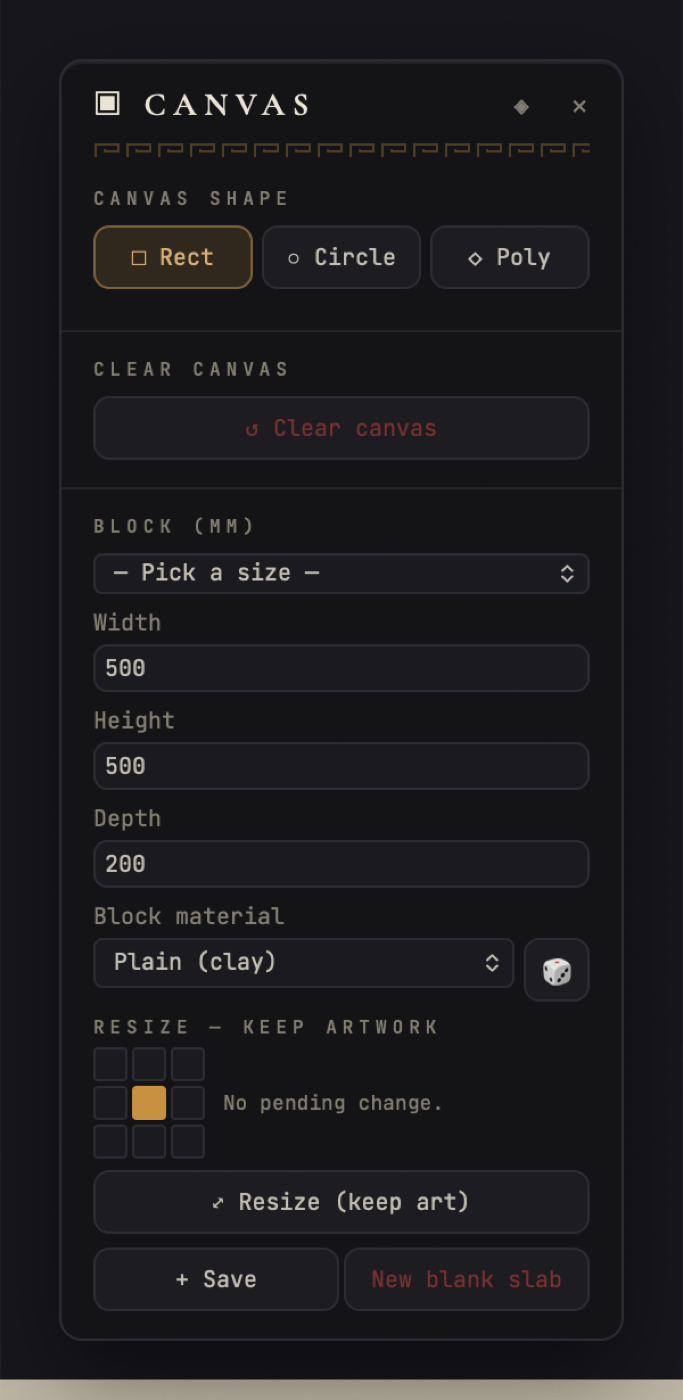
Set width, height and depth in millimetres. Resize (keep art) grows or crops the block without losing anything — carving, paint, materials, sets and layers all survive, new area arrives as blank clay, and an anchor decides which edge stays put.
The canvas is not only rectangular: a circle or oval, or a polygon you build by dropping vertices (following the grid, snap and symmetry, with corners you can round into curves). Everything — sculpt, paint, glaze, texture and the export — is clipped to the shape, and it is a live clip, so switching back to a rectangle restores the full canvas.
And the block is made of something. Plain clay by default, or:
- plywood ¾″, baltic birch 13-ply or hardwood-core 7-ply, at true construction scale — carving crosses the veneers and exposes their contour rings with thin dark glue lines, the walls read as stripes, and a block deeper than one sheet becomes a glued stack. This is what the CNC job will actually look like.
- solid hardwood — oak, walnut, cherry, maple, ebony — modelled as a real log, with growth rings that are cylinders around a pith sitting behind the back face, so the board shows cathedral flames that wander along it and carving moves toward the log centre, tightening the rings.
- solid stone — bianco Carrara, imperial red porphyry, giallo onyx, verde antico, portoro, rosso Levanto, pavonazzetto. Every stone is a true 3D field: veins are sheets in the solid, onyx bands are stacked laminae, breccias are clasts with cement in the joints. Carving genuinely moves through the figure — cut deeper and a band wanders — and the side walls show the same stone passing through, matching the face at the arris.
The 🎲 button rerolls the figure seed: same material, different slab. It is saved with the project, so a piece keeps its exact veining forever, and a new project quarries a new block.
Getting it out
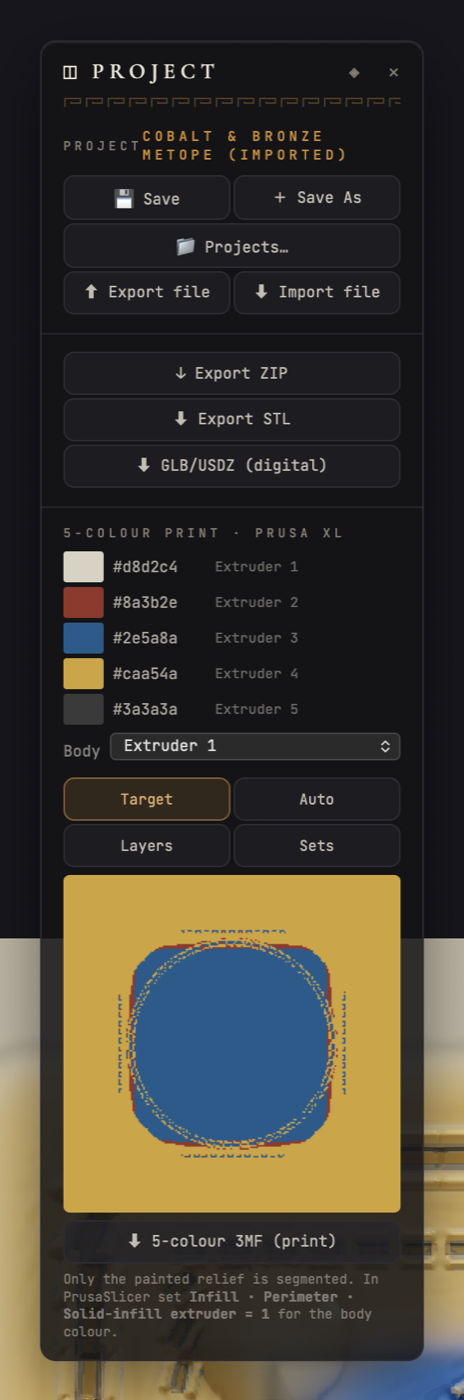
Projects live in the browser with thumbnails, and duplicate is how you branch a good relief. A .metope file carries everything — height, pigment, finish, texture, face sets, guides, the layer stack with its painted masks, the block seed — as one portable file.
Then four ways out:
- ZIP — the finished maps and mesh for fabrication.
- STL — a binary solid with a base plate, for slicing. Pierced holes come through as real holes.
- GLB / USDZ — the painted relief as a digital sculpture: displaced mesh with baked colour, roughness, metalness and emissive, the block material baked into the textures, and the environment carried along if you want it. This is the file that goes into a page or an AR viewer.
- 5-colour 3MF — an MMU segmentation file for the Prusa XL. Only the painted relief is written; walls, base and infill are left to the slicer. Four ways to decide which colour goes to which tool: target maps each painted colour to the nearest filament you actually have loaded (perceptual OKLab), auto extracts five representative colours from the painting, layers binds each paint layer to a tool exactly, and sets binds each face set to a tool exactly. The last one is the reliable path for hard-edged polychrome, because a region prints regardless of paint.
Shortcuts
| key | |
|---|---|
| Space tap | radial palette at the cursor |
| Space hold | pan (flat) / orbit (3D) |
| 5 | flat ↔ perspective |
| W · G | wireframe · grid |
| M | guide magnet |
| F or S | brush size, interactively |
| D | brush height, interactively |
| Home | fit the view |
| Shift | quick smooth |
| Alt | invert the tool |
| ⌘Z · ⇧⌘Z | undo · redo |
Lives in TROY/METOPE (metope.html, one file). Related: LAPIDEO-Research makes the marbles and woods it paints with; SKIA exports Metope-ready stamps for the image-to-relief press; DISEGNO is the sketchbook next door.